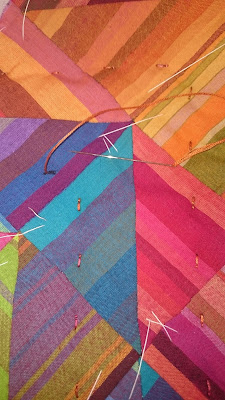
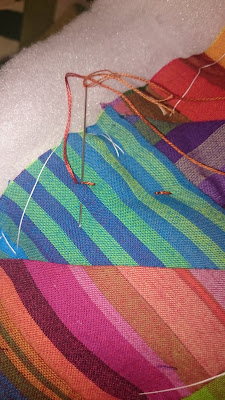
I learned the Methodist knot method of utility quilting from the book Rotary Riot: 40 Fast & Fabulous Quilts by Judy Hopkins and Nancy J. Martin. Someone in a quilting group kindly sent me a set of photos of various utility stitches in that book, and this is the second one I've tried after crowfooting. I choose it for the wheelchair quilt as the top was so busy that I felt crowfooting would be fighting with it, and indeed the Methodist knotting fitted in beautifully.
Here is the wheelchair quilt enjoying some sunshine and being photobombed by a painted lady butterfly. There were dozens of them in the garden, enjoying the first sun in two and a half days of solid rain. They mobbed the buddleias, sunbathed on the wall, and pairs of them danced together. It was spellbinding.
As with crowfooting, this method is very gentle on the hands, even if you are disabled, and it's quick to do. You don't need a quilting hoop or frame, and I find it comfortable to do Methodist knotting while sitting in bed. When I did a row of big stitch quilting around the edge of the quilt at the end, to give the binding more definition, I noticed how much harder it was on my hands with such a thick quilt, and was very glad I'd chosen Methodist knotting for the rest.
The stitch is a little less obtrusive than crowfooting, looking like an exclamation mark. It complements the wheelchair quilt top without overwhelming it. The coppery variegated embroidery thread I chose (DMC 4130) shows up just enough to be interesting, and echoes the burnt orange flannel used for the backing and self-binding.
I went for three strands of embroidery floss as perle #8 didn't come in that variegated colour, and it behaved reasonably well. You could also use perle #8, which would behave impeccably, and if you can manage to hide your knots without leaving visible holes, perle #5 could look stunning.
I went for three strands of embroidery floss as perle #8 didn't come in that variegated colour, and it behaved reasonably well. You could also use perle #8, which would behave impeccably, and if you can manage to hide your knots without leaving visible holes, perle #5 could look stunning.
A #7 embroidery needle worked well here, and now that I am using #7 short darners for my crowfooting, I'd probably choose those instead. They're the same diameter and also have an eye that is big enough to thread comfortably without being so big that the thread falls out, but they're a little longer. If you are going to space your stitches much further apart than I did (which was 1"), try #7 long darners, or if you want then several inches apart, look at doll/soft sculpture needles.
As with crowfooting, this stitch can be used as a replacement for tying a quilt, which seems to be how it is traditionally used, or spaced more closely and used as a quilting replacement. I spaced my stitches 1" apart and my rows 2" apart, and it reads as somewhere in between tying and quilting, I think. This was a very thick quilt, with two layers of Polydown batting and a flannel back, so it looks very puffy, and you get a nice channel effect between the rows.
My rule for these utility quilting stitches is to make sure the distance between rows is a minimum of double the distance between stitches, for them to read properly as rows. The constant back and forth of the backstitches means the stitching is nice and secure.
If you are Methodist knotting a quilt that has an ordinary batting, you could possibly layer and secure your quilt as if for basting, then go straight into the Methodist knotting and skip the basting. I was going through a very thick quilt, so I thread basted as usual, and was glad I had the flexibility to move the quilt in my hands while working on it.
You can space your stitches by eye, or mark them up in advance. I made myself a little template with gridded acrylic and marked two stitches for each 3" half-square triangle, making the lines for the stitches a little over 1/4" long, and using Crayola washable marker pens. Experiment on a trial sandwich to find which stitch length works for you, making sure your stitch that goes through to the back shows up there.
There are the instructions from Rotary Riot. I spent a while staring at them in bewilderment, so here is a series of photos breaking it down further.
1. Tie a knot in your thread 1/2" to 1" from the end, with two wraps if it's perle #8 or three strands of embroidery floss, and one wrap if it's perle #5. By now I've had one knot pop out of this quilt and have to be sewn back in, so I reckon the longer tails will help keep it better secured. Insert your needle into the quilt 1/2" to 1" away from your stitch, in the direction you are coming from. Take it through the batting, without going through to the back, and bring the needle out between 2/3 and 3/4 of the way along your marked stitch, here shown with a black marked line.
2. Pull the thread through, here shown just before you bury the knot. Pull the knot through with a sharp tug, using your other hand to hold the quilt nearby to make it easier to pull through. Rub your thumbnail over the hole left by the knot a bit, and that should move the fibres back together so that the hole is gone. (It's much trickier to do this with perle #5, and it probably depends on the weave of the fabric.)
3. Push your needle down, all the way through to the back. This is the only time your thread will go through to the back of the quilt, and you can feel to make sure it's going through with your non-dominant hand, which is under the quilt top. If your batting is thin, you can take an ordinary backstitch without fuss. My batting was very thick, so I had to angle the needle straight down at the start of the backstitch, as you do when making rocking stitches with traditional quilting.
4. Make a backstitch, going through all the layers, and bring your needle out at the front of the marked line, so that it is coming out a little ahead of where the thread is currently coming out of the quilt. Pull the thread through. This is your first backstitch, and is the long backstitch. It produces a single straight stitch on the back.
5. Put the needle back in at the point where the long backstitch started, where the long and short backstitches meet. This will be your short backstitch, and will only go through the batting. It will not go through to the back.
6. Travel your needle through the batting and bring it out in your next stitch, 2/3 - 3/4 of the way along the stitch, ready to begin the long backstitch for your next stitch. In this photo, I have turned a corner with my quilting line. You have now finished one Methodist knot stitch and are starting the next.
7. To end a line of stitching, when you are finishing your short backstitch, put the needle in at the point where the long and short backstitches meet, travel it through the batting only, and bring it out 1/2" away.
8. Tie a knot, insert the needle back in exactly where it came out, go through the batting only, and bring it out 1/2" or so away, angling it in a different direction this time. This will make it easier to pull the knot through and get it hidden beneath the top.
9. Pull the thread through and give it a tug to bury the knot. Here you can see it just before the knot is pulled through. Rub your thumbnail over the hole to make it disappear as before. Snip the thread where it comes out.


